Build an AI-Powered Automated System For Topic Research With No Code
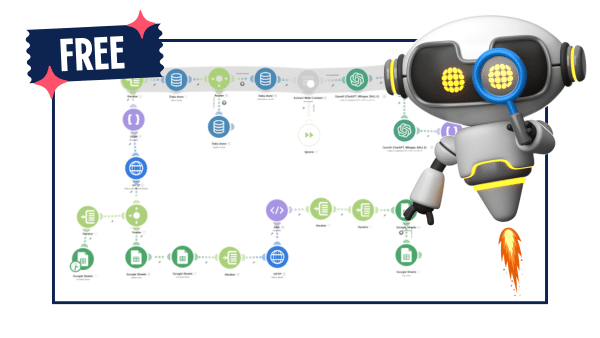
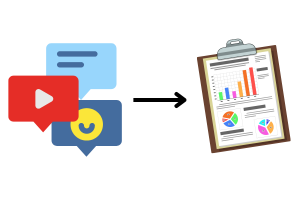
In this post, we will be building this system:
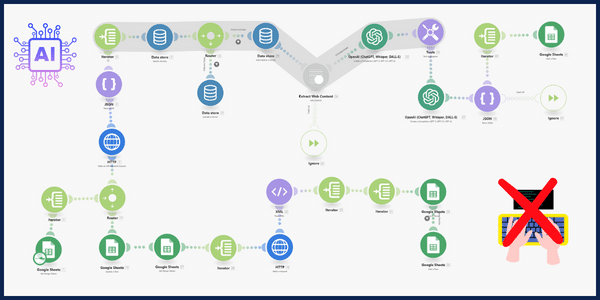
Don’t worry; it’s not complicated. I’ll provide the system for free, so you can copy and use it directly without having to build it yourself.
Remember, there will be no coding involved. We will use No-Code Tools.
What to expect?
Before we start, let me share what you can expect from this system so you can decide if it fits your needs before reading the full post. (I respect your time 😉)
When you run this system, it will primarily perform two tasks:
1- Keyword Research (Keyword Bomber Method)
The system will conduct intensive keyword research using the Google Suggestions API.
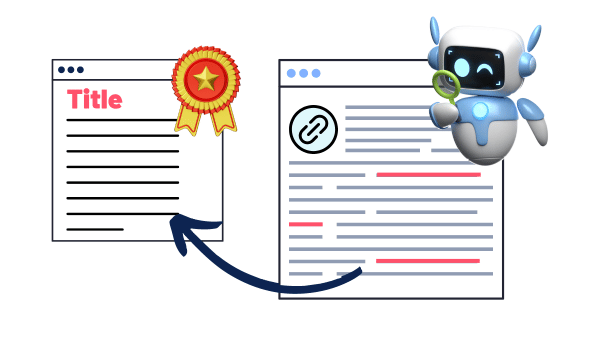
The system will analyze numerous articles in your niche and extract new topic ideas for you to create content on.
All data will be recorded and organized in a Google Sheet for easy access. Here is a sneak peek:
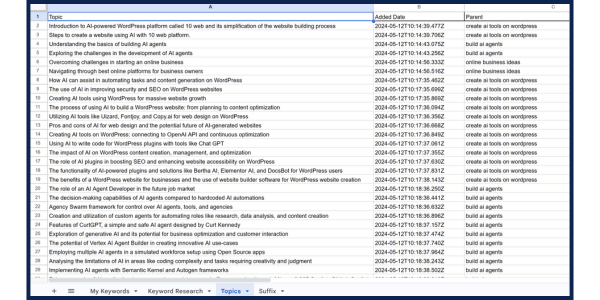
This system is a game-changer. It can save you a lot of time, and with some tweaks, it can be even more powerful and provide 10x more results.
We will discuss this in more detail later in this post and show you some examples I’ve worked on.
No Code Automation Tools
The first step is to pick the no-code automation platform to work with.
There are different platforms available, but I prefer using Make.
Why? For two reasons:
1- Customization: I started using the platform recently, and I fell in love with it. I love how much I can customize my workflows. I can build whatever automation I imagine.
2- Affordability: It is much more affordable than other services like Zapier, which I recently migrated from.
So, join Make if you haven’t yet, and let’s get started!
Understand The System.
Before we set up the system, let’s first understand it. This is very important if you want to customize and edit it, as we will see later.
As I mentioned before, the system I built for you consists mainly of two workflows:
- Keyword Research Workflow
- Topic Research Workflow
Both workflows start with a list of keywords you provide in the Google Sheet “My Keywords” page.

So first, add a list of keywords that you want your search to be based on.
Now, let’s see how each workflow works.
Keyword Research Workflow

We first start by looping through our “My Keywords” list, and for each keyword, we will generate a list of keyword suggestions through the Google Suggestions API.
I explained this in detail in the Keyword Bomber Guide. Let me explain it quickly, and you can check the guide for more details.
I created a list of letters in the Google Sheet, which you can find on the suffix page:

For each letter on this page, I call the Google Suggestions API with the parent keyword like this:
http://google.com/complete/search?output=toolbar&gl=US&q=[Parent Keyword] [letter]For example, for the letter “a” and the keyword “digital marketing”:
http://google.com/complete/search?output=toolbar&gl=US&q=digital marketing aIf you run this URL in the browser, we get something like this:

We have this XML output from the API. I looped over the values and saved them in the “Keyword Research” page in Google Sheets.
This way, for each letter, we have 5-10 keywords, allowing us to conduct intensive keyword research with this workflow that can generate up to 300 keyword ideas for each parent keyword.
Remember that these suggestions are what people are searching for on Google.
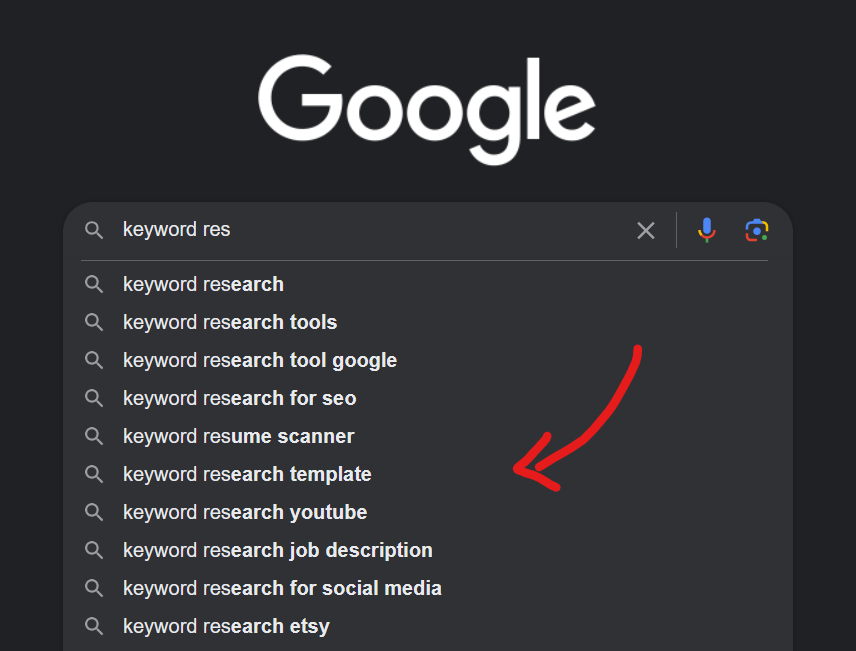
This is one of the best ways to find keywords and ideas for creating content and ranking on Google.
The Topic Research Workflow
The second workflow is a little more detailed, where I used a combination of AI, Google SERP API, and built-in databases to get the results.
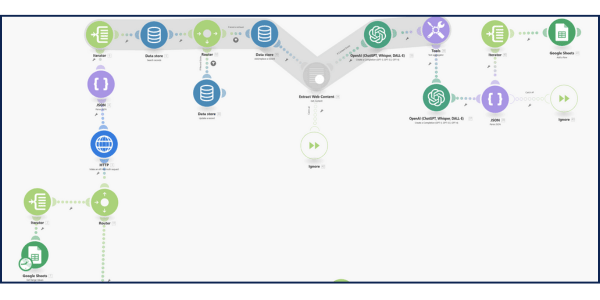
The workflow starts the same way by looping over the “My Keywords” list.
But now, for each keyword, we will do a Google search and get the top “X” results.
“X” is the number of results you can set in the HTTP module called the Serper API.

I prefer to keep this between 5-10 to avoid increasing the number of tokens when using the AI API. This may cause a context limit depending on the AI model you select and may cause you to use more credits.
Anyway, we get the top 10 Google results and then check if this link is already in our database.
The database is a simple table I created to save the results, avoiding duplicate topics and web pages. We don’t want to extract topics from the same pages.
So, if the link is already there, we will skip it. If not, we will move to the “Extract Web Content” App.
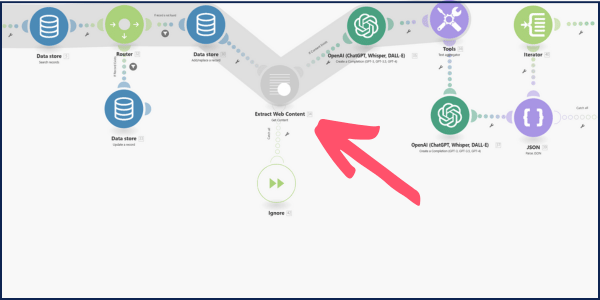
It is a free app I created to help you read any content from any page easily.
We read the content and pass it on to our AI module, “OpenAI,” which extracts the topics from the page.
At this stage, we have a list of topics from each web page. We use a text aggregator to combine all ideas into one piece of text.
Finally, we pass the list again to OpenAI to extract unique content and return it in a JSON structured format, which makes it easy for us to read and save in our Google Sheets again!

Setup The System
Perfect, now that we understand how the system works, let’s set it up!
Step 1: Log in to Your Make Account
If you don’t have an account, sign up and log in.
Step 2: Install the Content Extractor App
It is very simple: click the button below:
You will see this page:

Click “Install,” and you are done!
Step 3: Clone the Google Sheet
As explained before, the system reads and saves data in a Google Sheet. I prepared the sheet to make it easy for you to get started quickly. Just create a clone of it in your Google account.
Step 4: Create a Datastore
Before we set up the system, you need to create a data store.
So head to “Datastores” from the right menu and create a new one.
Call it SERP_RESULTS
Create a new data structure, which means adding fields to the table. Add the following:
| Name | Type |
|---|---|
| link | Text |
| position | Number |
| Parent Keyword | Text |
| Last Updated | Date |
Great! We have our data store. We are ready to create the automated system.
Step 5: Import The System Blueprint
Now, go to “Scenarios,” create a new scenario, then click “Import Blueprint.“
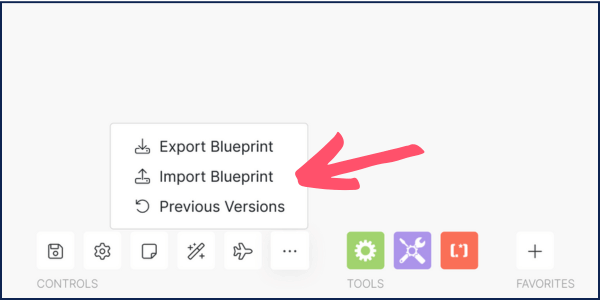
Download the blueprint here:
🔴 DON’T FORGET TO EXTRACT THE ZIP FILE FIRST
Step 6: Update the Modules
Now that we have the scenario, the database, and the Google Sheet, we need to update our app modules to match your accounts.
1- Update the Google Sheets Module Authentication
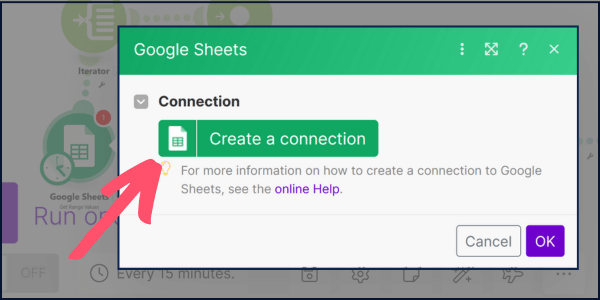
Please update all the Google Sheet modules and the spreadsheet ID, which can be found in the browser URL.

2- Connect OpenAI Module
Click on the OpenAI App to connect with your account using your API key.
3- Set the Serper API Key
Since we are using the Serper API to get Google organic results, get an API key and set it here.

4- Connect with your Datastore.
Make sure all modules are set up correctly and update the datastore module to match the datastore we created in step 4.
5- Set “Extract Web Content” API Key
To use my app for free, make sure to use this API key: HASAN2024
Step 7: Run a Test
Perfect, we have our system ready! Give it a try!
If you have any problems, you can join us on the forum; it is free!
I will be there almost every day to help.
Bonus 1: Sell the System!
If you came to this article from my YouTube video, you know I discussed how these systems can be used to build a business in today’s “AI Era.”
One of the most in-demand products in the digital world today is ready-made systems, or what we call “done-for-you” systems.
Businesses and individuals need plug-and-play systems that help them automate or fix a specific problem.
This system is a great example of a “done-for-you” system that you can sell online. You could also use it as a powerful lead agent.
Now, I’m giving it to you for free, yes. But that doesn’t mean you shouldn’t join my newsletter to get my weekly updates and exclusive tips 😅
Anyway, the idea here is to learn and build such systems. This service will make you stand out in the competition today, as it is still new and not many freelancers know about it.
🟢 As a bonus tip, to make your offering even more unique and provide more value to your customers, and help you turn this into a recurring income business:
You can create custom apps in the workflow you are selling. Like the one I shared with you for free, the “Extract Web Content” app.
Yes, I gave it to you for free, but you can create something similar that makes your system unique and helps get your customers attached to the service you provide.
Do it, and thank me later 😉
How did I build the Make Custom App?
Make allows you to build any custom app you want as soon as you have the API endpoint for it.
So what I did simply was create a very basic API in Python. Here is the code:
from fastapi import APIRouter
from SimplerLLM.tools.generic_loader import load_content

router = APIRouter()

#extract content from blog post
@router.get(
    "/tools/extract-content-from-page",
)
async def extract_content_from_web_page(
    url: str,
):
    return load_content(url)
I used SimplerLLM, my free Python library.
You can see how easy it is to read content with the built-in functionalities.
And built the app based on that.
👉 You can learn more about APIs and how to build and sell them in this course here.
You can add an API key as I did, and this app can even be sold independently as a custom app for Make that helps build more complex and customized systems!
Bonus 2: Advanced Tips
In addition to building custom Make apps, you can extend this system to provide more functionalities and value to your customers or your own business.
Here are some ideas:
1- Add AI Analysis
It would be a great addition to the system to have AI analyze the final results and suggest tips based on that.
For example, my AI-powered SEO analyzer extracts an SEO report using an API, and then AI analyzes and creates a detailed report based on that data. You can test it here.
Another example is the AI keyword research tool, where I feed the keywords to the AI, and it suggests a content plan and tips based on that data.
You can even go further with an agentic workflow that automates the entire process.
2- Add Keyword Position Tracking
Since we are already extracting organic Google results with the Serper API and saving them in the database with their positions, you can also track the position of specific domains for each target keyword to see if they rank.
3- Add Keyword Metrics
You can also add more metrics to the keywords, such as search volume, keyword difficulty, CPC, and much more. This will enrich the data for AI analysis or your customers.
You can obtain such data from SEO APIs like Spyfu, Semrush, and others.
4- Optimize the Prompts
When you open the OpenAI modules, you will see I added some prompts to extract content ideas from text.

These are not the best or perfect prompts. They do the job, but you can optimize them to get better results.
If you have taken my prompt engineering course, you know that with some prompting techniques, you can optimize the prompts for better results.
Remember, if you have any problems or want to chat, hop into the forum. I’m there almost every day to answer your queries!





UDT (User defined type) not found: UDT not found ‘json:122410’.
How to fix this
please post the question on the forum to follow up
Salam, Hasan this is an excellent video and I am for the first time trying to execute this at my end. I have done a lot of things and now have few questions. 1. Looks like ChatGPT API is paid, want to confirm if there is any option to use free? 2. I have created an API but the dropdown for ChatGPT version in your workflow does not show 3.5, it starts with 4, 3.5 turbo…..I am not sure what is the version of my API ( I assume it should be 3.5 as i did not pay anything to get this). Till the time these issues are not resolved, my scenario is unsaved and I will probably lose changes I made. Pls let me know how can I connect with you in the fastest possible way to get help. Also when I finally tried to run the workflow, it gives this error “UDT (User defined type) not found: UDT not found ‘json:122410’.”
you can save your workflow. and please join us on the forum so we can follow up
thank you, i did evrthings but it doesnt works, here is mistake i recive. Can someone help me please?
mistake: UDT (User defined type) not found: UDT not found ‘json:122410’.
I friend, I remember I saw you on the forum, yeah? we can follow up there
[…] Let me give you an example from my work where I developed an automation system that performs two tasks: […]
Hello! Before the last Google Sheets always gave me that error: The operation failed with an error. 400: INVALID_ARGUMENT – Unable to parse range: ‘2’!A1
how we can automate share on social media?
you can add Social Media Modules in Make
[…] Generating blogging ideas and […]
Hi Hasan. Thank you a lot for this workflow. I have the same error as many of the users : UDT (User defined type) not found: UDT not found ‘json:122410’.
Have you an idea ?
you just need to make sure that the module raising an error has the right data structure. check 1 by 1